The Avi-on ZoneScanner Tool enables electricians to automatically assign Avi-on devices to specific control zones during the installation process.
The ZoneScanner Tool is separate from the Mobile Commissioning App and does not require a login or username.
ZoneScanner data remains within the ZoneScanner Tool until it is uploaded to the Mobile Commissioning App or Avi-on Pro.
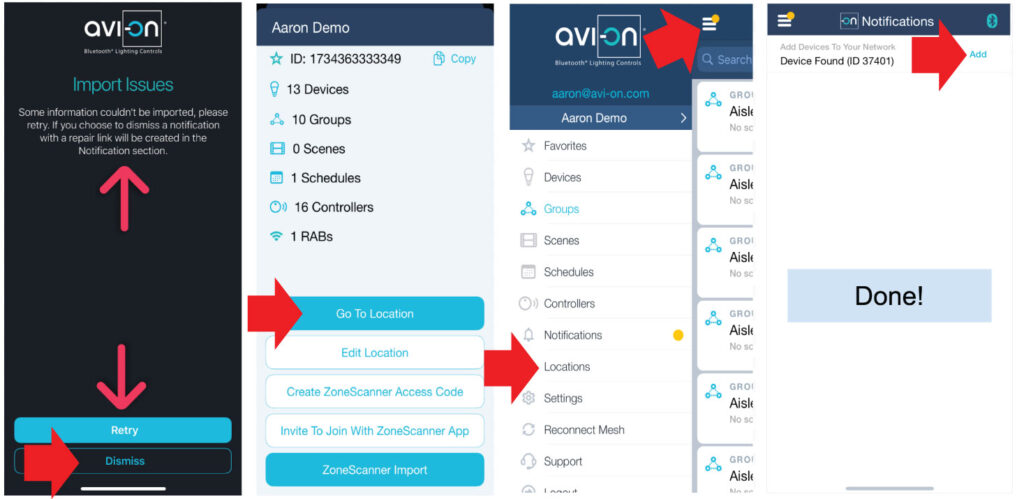
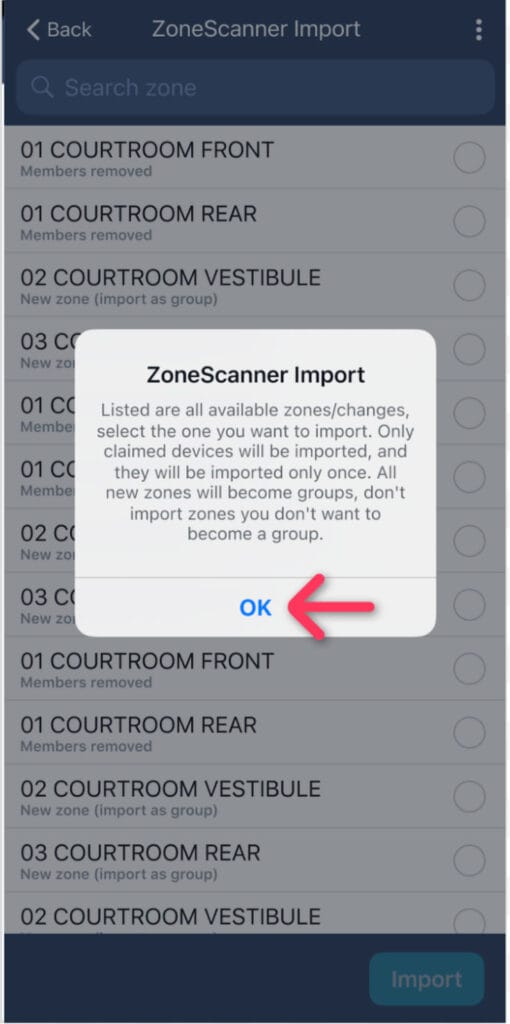
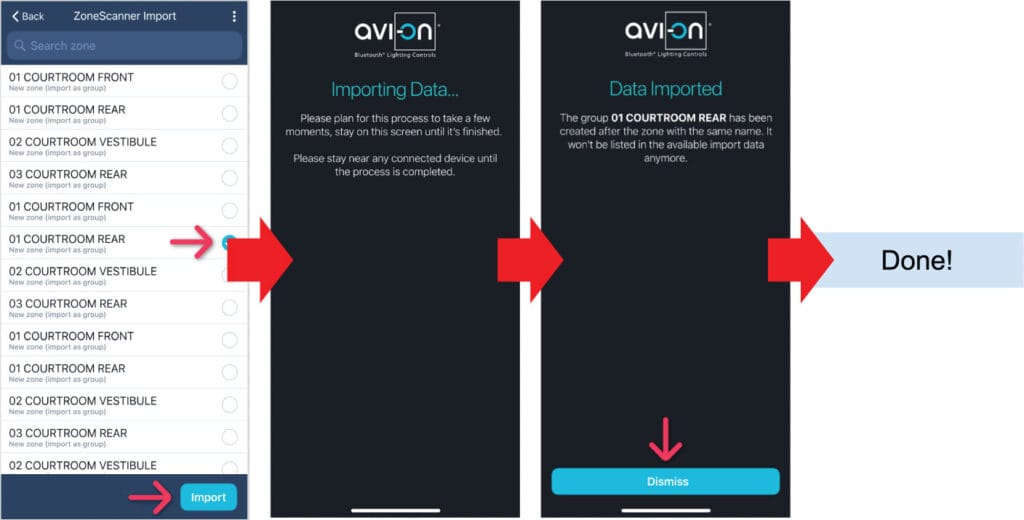
Once devices have been claimed within a location, the ZoneScanner import functionality of the Mobile Commissioning App creates groups for each zone, assigns devices to their respective groups, and renames devices to match the group prefix.
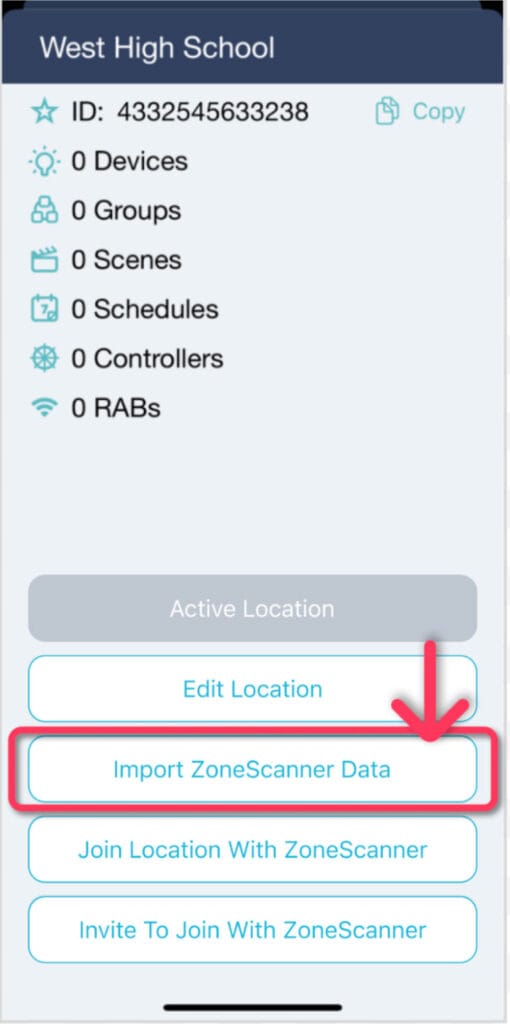
Importing ZoneScanner Data
The Bluetooth® word mark and logos are registered trademarks owned by Bluetooth SIG, Inc. and any use of such marks by Avi-on Labs, Inc. is under license. Other trademarks and trade names are those of their respective owners.