The Avi-on Movable Switch is designed to beautifully and conveniently enable you to add switches without adding wiring.
It is amazing technology, and here are a couple of design features that may help you understand why it operates the way that it does.
Here is some guidance about ON, OFF, and DIMMING lights with the Avi-on Movable Switch.
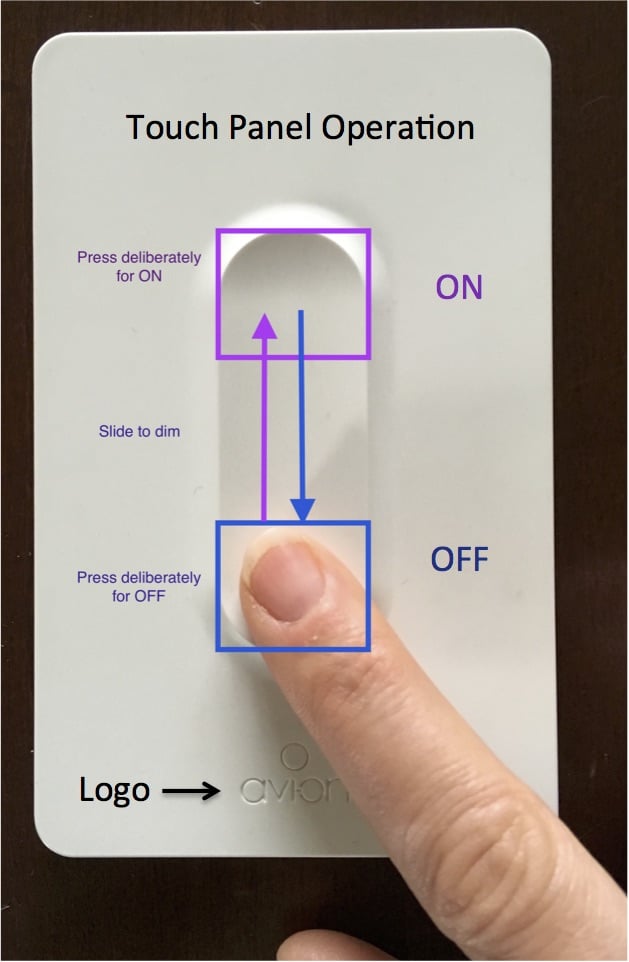
See photos at the end of this article.
To use an Avi-on Movable switch, you first need to have an Avi-on User Account, and set up an Avi-on compatible device, like a plug in or in-wall switch, or light bulb.
The next step is to power up and install your switch.
First remove from the box and remove the back plate by pressing your thumbs forward on the front of the switch, near the top. The back panel should slide down opposite the switch. Lift the back panel off.
Next install the three CR2032 batteries provided in the box. They should be installed fat side up (+).
IMPORTANT: The red indicator light should come on for about 1 second and go off. If the light stays on permanently, it is necessary to remove the batteries and reinstall them again. The switch will not function if the light is on permanently.
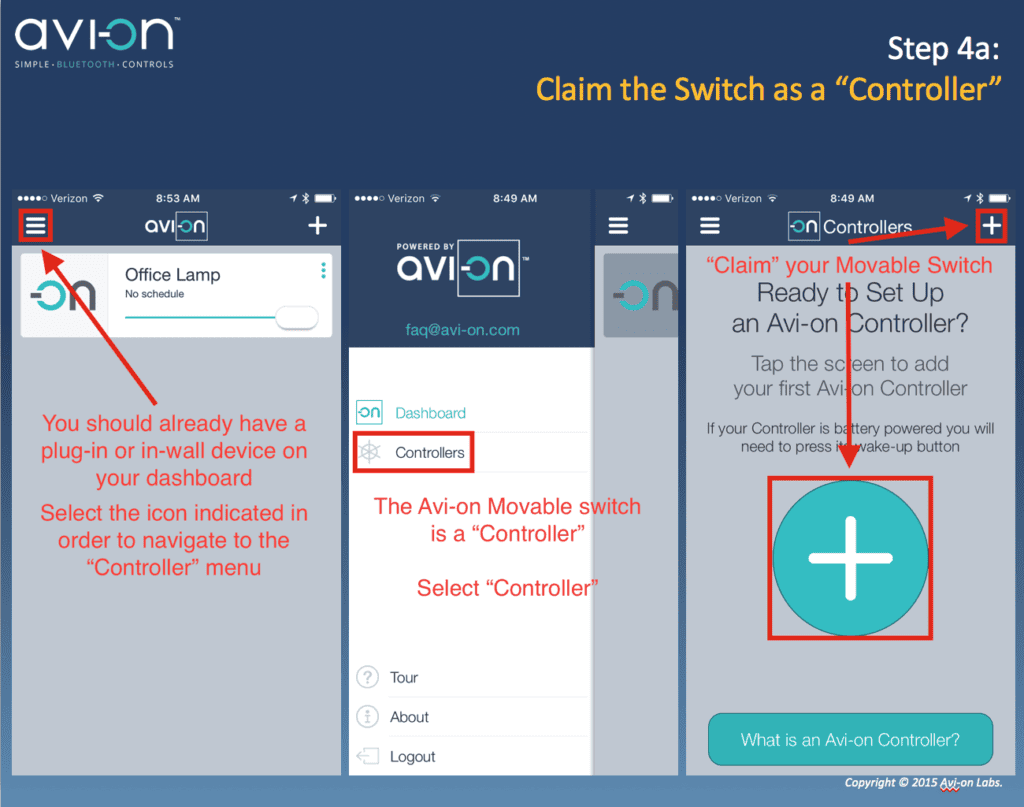
Go to the Avi-on app and navigate to the controller screen.
Press the “+” button on the upper right.
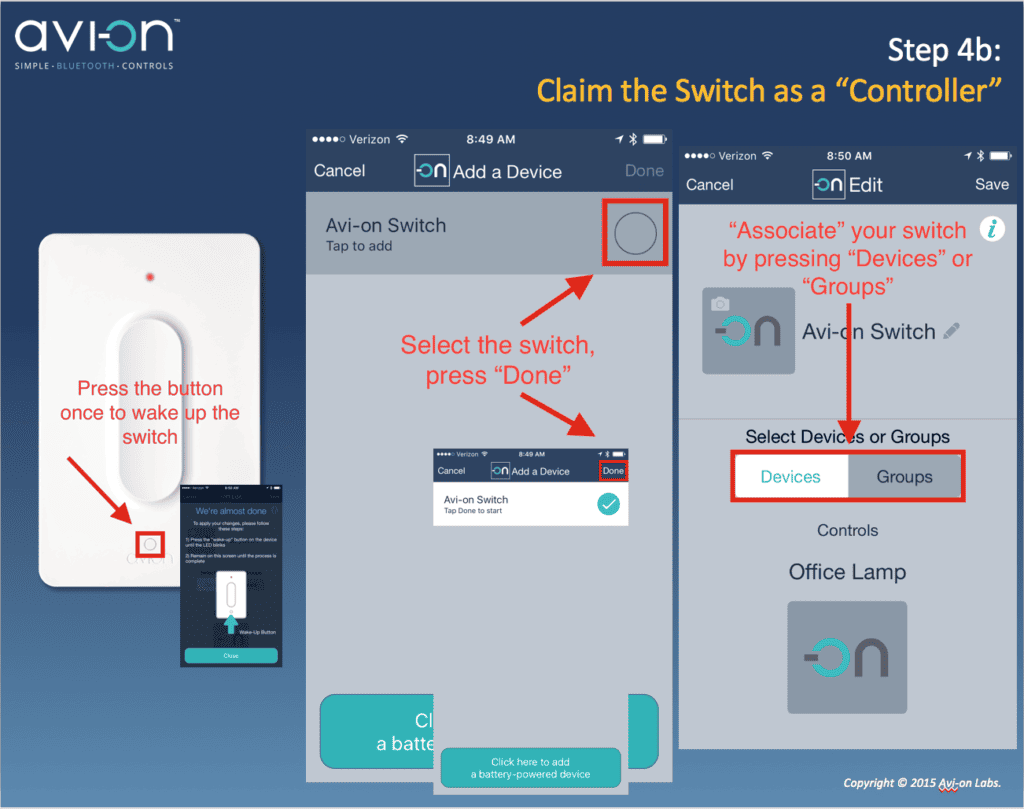
Next, Press the button on the Switch so that the red light is flashing a double flash.
At this point you should see the switch appear on the screen. If the switch does not appear in the screen before the flashing light goes off, then press the button on the switch again and repeat the process.
If it still does not appear, the device may already have been added to another account. If so, press the button 4 times to reset the device. The red LED will flash 4 times while it is resetting. Note: This reset will remove it from the account, but device record will remain in the original account until removed manually with the app.
Select the switch and press “Done.” It may take up to 30 seconds for this process to complete.
If the switch does not successfully add before the flashing light goes off, then press the button on the switch again and repeat the process.
At that point the switch will be added and you will be ready to associate it to a device.
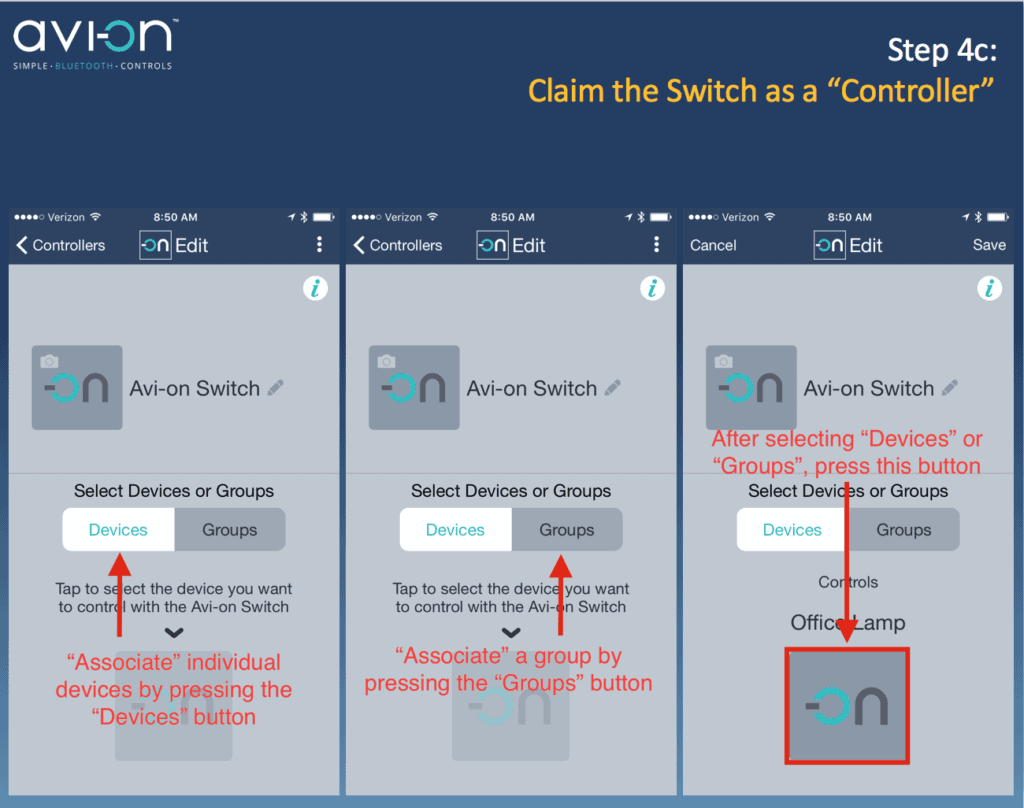
If you want to associate to a single device, select the “Devices” tab at the bottom. Swipe the device photos left or right until you find the device you want.
To associate to a group of devices, create a group if you have not done so already. Then press the “Groups” You must create the group before you associate with the switch. Next swipe the group photos left or right until you find the group you want.
If you like, you can give the switch a name and a photo by touching the switch name or photo.
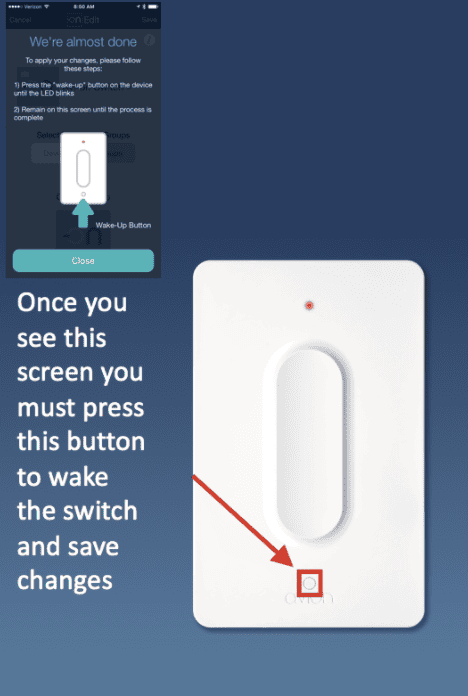
Before your switch will work, it is necessary to save the configuration to the switch. There are two steps to this process:
Pressing the button on the switch is necessary because the switch circuitry stays “asleep” unless someone is specifically touching it. This is done to extend the battery life.
You will know that the switch has properly saved when the app closes the association screen and returns to the controller dashboard, and you will also see the device or group name on the switch dashboard.
IMPORTANT: If you do not press the button on the switch and see the app close the association screen, the changes will not be saved to the switch and it will not work as expected.
You can put the switch pretty much anywhere you like. use the included tape or screws to stick to the wall, or just put on an end table or coffee table. More detailed installation instructions are included below.
The Bluetooth® word mark and logos are registered trademarks owned by Bluetooth SIG, Inc. and any use of such marks by Avi-on Labs, Inc. is under license. Other trademarks and trade names are those of their respective owners.