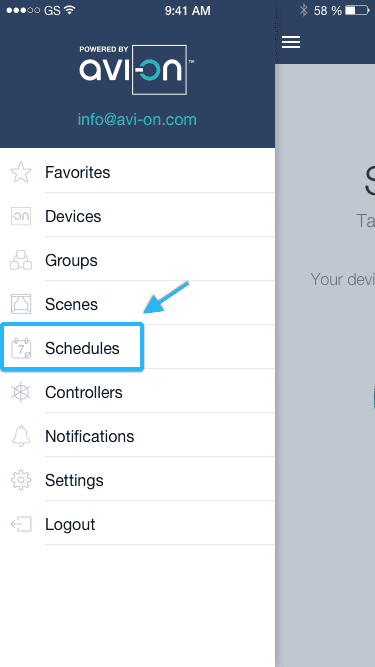
You can now create general schedules that can be assigned and removed to different devices, groups and scenes. Schedules have their own screen within the app that can be accessed from the app drawer menu. To access the app drawer menu, press the menu icon in the upper left hand corner of the “Favorites/Devices/Groups/Scenes” screen. Note that this icon is in the same location throughout the app, so you can always press them to return to the drawer menu.

Enter the schedules section, tap the large plus sign in the center of the screen, or in the top right corner, to create your first schedule.

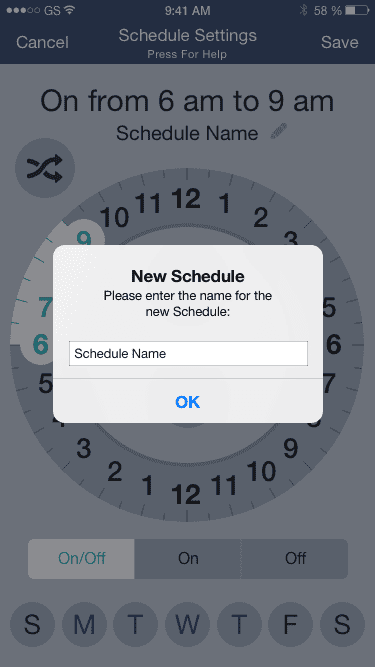
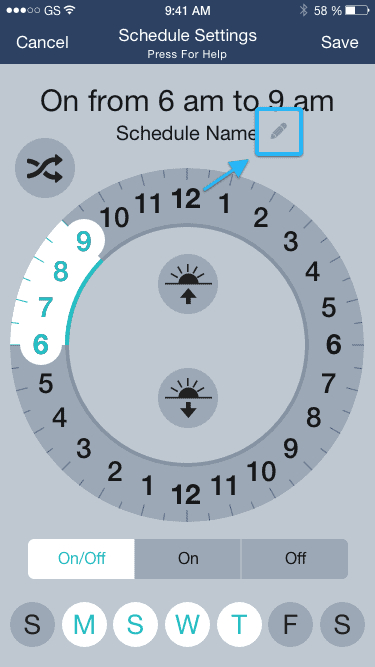
Set the new Schedule’s name in order to continue, then press “Ok”.
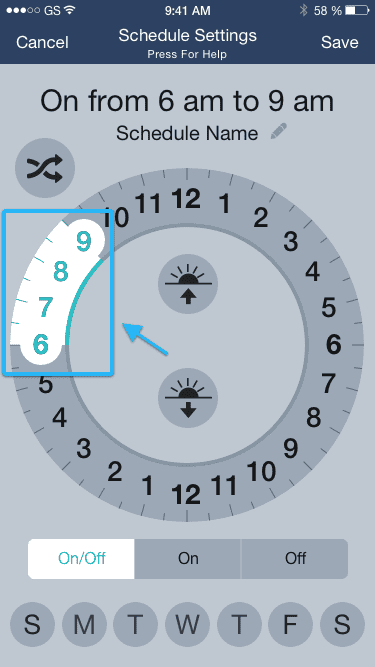
Using the dial, set your desired schedule.
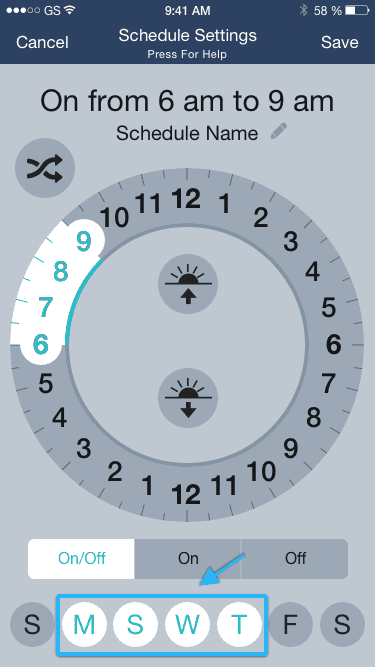
Tap the days of the week that you want the schedule applied to. You must select at least one day for the Schedule to save it.
Tap the pencil icon next to the schedule name to edit it.
Then press “Save” to create the schedule (if you press “< Back” without saving the schedule won’t be created), and then “Apply” to select devices/groups/scenes to apply the schedule to (explained in detail in the next section).

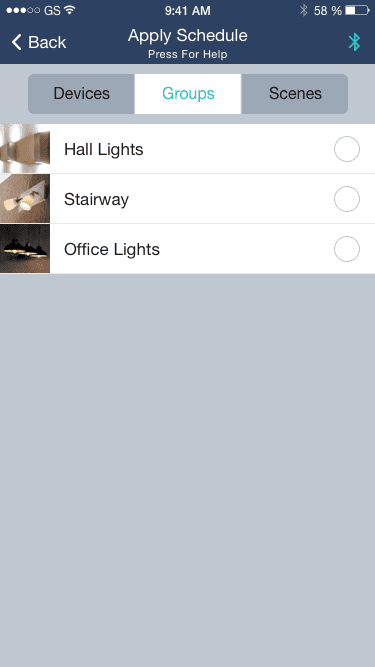
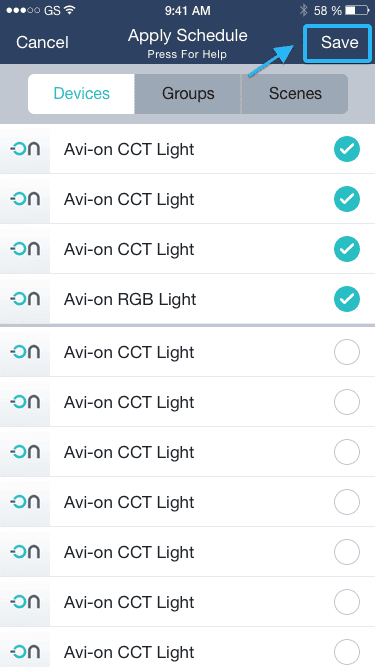
In the schedule creation flow, after saving your schedule, you will see an “Apply” button in the upper right corner (same spot as the “Save” button). If you press it you will see a list of available devices/groups/scenes (devices must be claimed in order to assign a schedule. If you have not already claimed your devices, you should do so now), and select those you want to apply the schedule to.
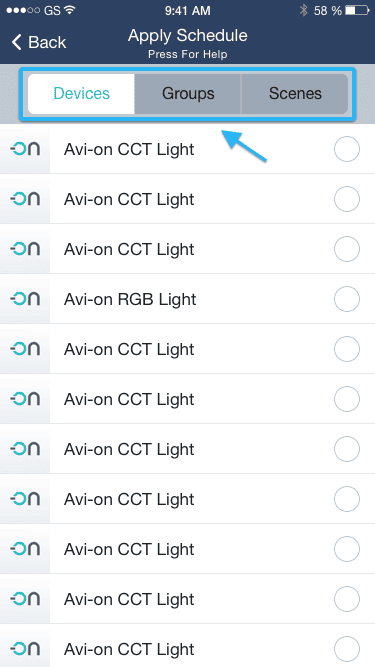
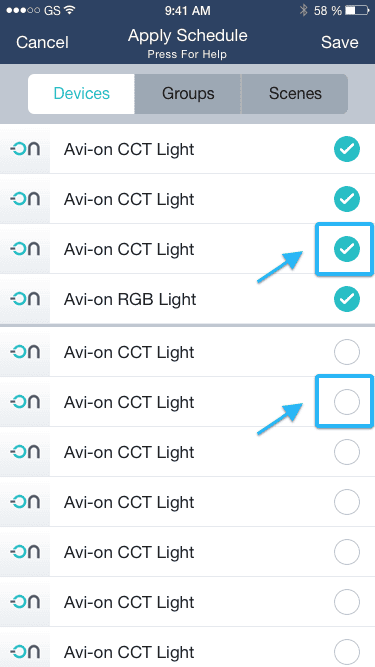
You can browse between devices/groups/scenes with the filter button at the top of the screen. Once you have selected the items you want to apply the schedule to, press “Save” to save the changes.
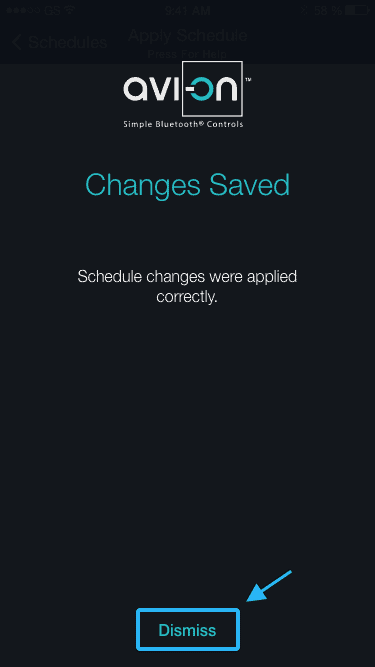
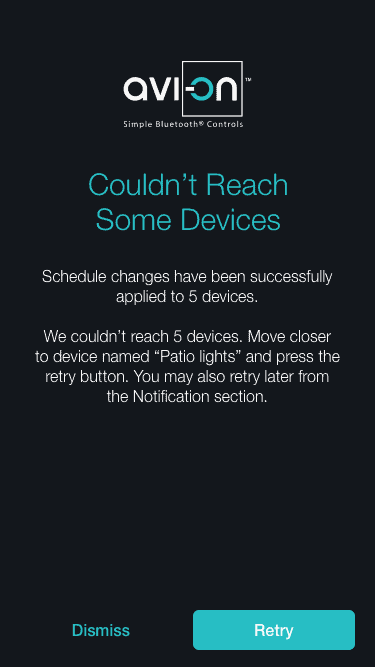
You will then see a screen that says “Saving…” with a status bar. Once the schedule is saved, you will see a “Changes Saved” message with a “Dismiss” button at the bottom of the screen that will take you back to the Schedules screen. You will now be able to see a note above the name of your device/group/scene indicating the next time that it is scheduled to turn ON/OFF. An example of the note is shown below, “On at 7:45 pm.”

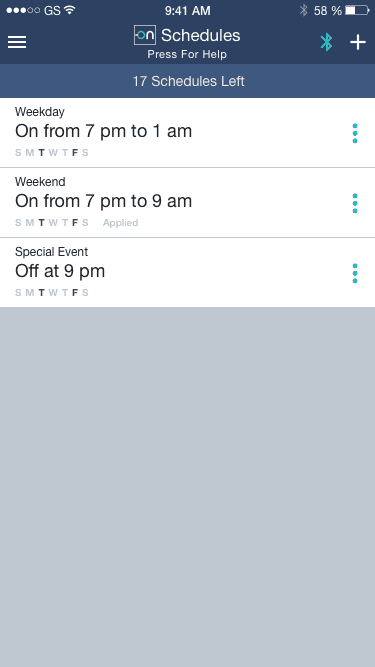
In the Schedules screen you will see your schedules. By swiping left you will see their contextual menu with the “Apply To” button that opens the list of devices/groups/scenes to select and apply the schedule as previously described.
Similarly, the screens you will see for assigning a schedule to a group are shown above.
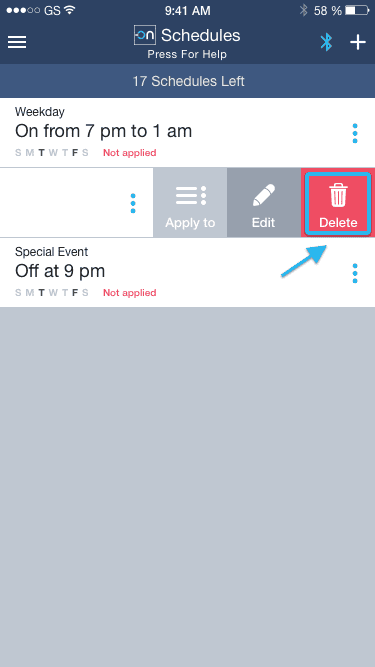
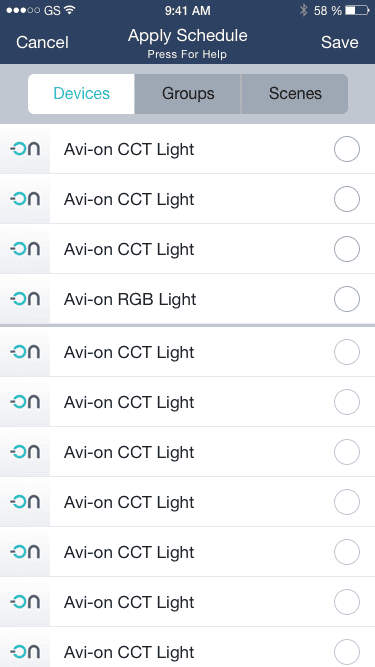
To remove a schedule from a device, go to the Schedules screen, swipe right the schedule you want to stop applying, press the “Apply To” button to get the list of devices/groups/scenes.
At the upper section of the list, with a green check icon at the right side if them, you will see all devices/groups/scenes with the schedule applied to, press the ones you want to remove the schedule from and press “Save”. After this, the “Saving Changes”, and tapping “Dismiss”, you will go back to the list of devices/groups/scenes without the recently unselected items checked in the upper part of the list.
The following functionality requires the Remote Access Bridge (RAB).
You can see which schedules are associated with particular devices by logging into your account at myaccount.avi-on.com (you can see it on the app, as well, but it is easier on the web)
Access your Schedules by opening the app drawer menu and selecting the “Schedules” section.
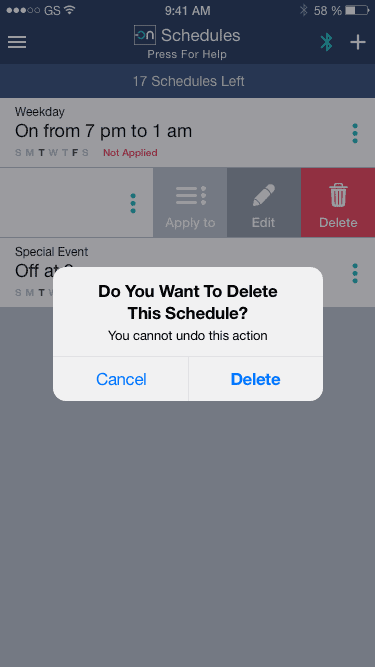
Tap the “three vertical dots” icon or swipe left on the desired schedule, then tap the “Delete” button. You will be prompted to confirm the action, since it cannot be undone.
Access your Schedules by opening the app drawer menu and selecting the “Schedules” section.
Tap the “three vertical dots” icon or swipe left on the desired schedule, then tap the “Edit” button. You will be taken to the Schedule Settings screens.
From the Schedule Settings screen, you will be able to change your Schedule active hours (randomize, set to sunrise or sunset), the active days and also change the Schedule’s name. After you’ve made the necessary changes, just tap “Save” on the top right corner to apply the changes to all of the associated devices/groups/scenes.


In the Schedules screen you will see your schedules. By swiping left you will see their contextual menu with the “Apply To” button that opens the list of devices/groups/scenes to select and apply the schedule as previously described.


You can browse between devices/groups/scenes with the filter button at the top of the screen. Once you have selected the items you want to apply the schedule to, press “Save” to save the changes.


You will then see a screen that says “Saving…” with a status bar. Once the schedule is saved, you will see a “Changes Saved” message with a “Dismiss” button at the bottom of the screen that will take you back to the Schedules screen.


You will now be able to see a note above the name of your device/group/scene indicating the next time that it is scheduled to turn ON/OFF. An example of the note is shown below, “On at 7:45 pm.”

Creating Schedules Video
The Bluetooth® word mark and logos are registered trademarks owned by Bluetooth SIG, Inc. and any use of such marks by Avi-on Labs, Inc. is under license. Other trademarks and trade names are those of their respective owners.